Create an indie game website using Astro 4.0 in 2024

🚀 Experienced Software Developer | Passionate Problem Solver | Creative Coder With over a decade of dedicated experience in software development, I bring a wealth of expertise across various domains of frontend and backend website and application development. My journey in the tech world has been marked by a fervent passion for problem-solving, coding excellence, and innovative design. Key Skills: Languages: HTML5, CSS3, Javascript, PHP, C# Frameworks & Libraries: Vue.JS, Nuxt, Ionic Content Management System: Wordpress Game Development: Proficient in designing, programming, and publishing Unity games Beyond traditional development, I nurture a keen interest in game development. I have not only designed and programmed mini Unity games using C#, but I've also actively participated in online game jams to refine my techniques and elevate my programming skills. Being an integral part of a religious community, I've embraced a commitment to continuous personal and professional growth. In addition to my technical prowess, I have honed valuable soft skills through ongoing participation in seminars on communication, leadership, team collaboration, public speaking, accurate reading, and personality development. These skills equip me to work seamlessly as part of a team, take the lead, train others, and confidently operate independently when needed. Join me on this exciting journey as I share insights, tips, and experiences from the dynamic world of software development and game design. Let's explore the endless possibilities of code and creativity together!
Astro.js is looking to be the go-to framework of 2024 with so many features and integrations for your content-focused websites.
At the beginning of December, I decided to take a look at tutorials for Astro on YouTube by TraversyMedia, JamesQQuick, and CodingInPublic and I realized that I could make simple clean website templates using Astro as I was learning it.
Template Preview
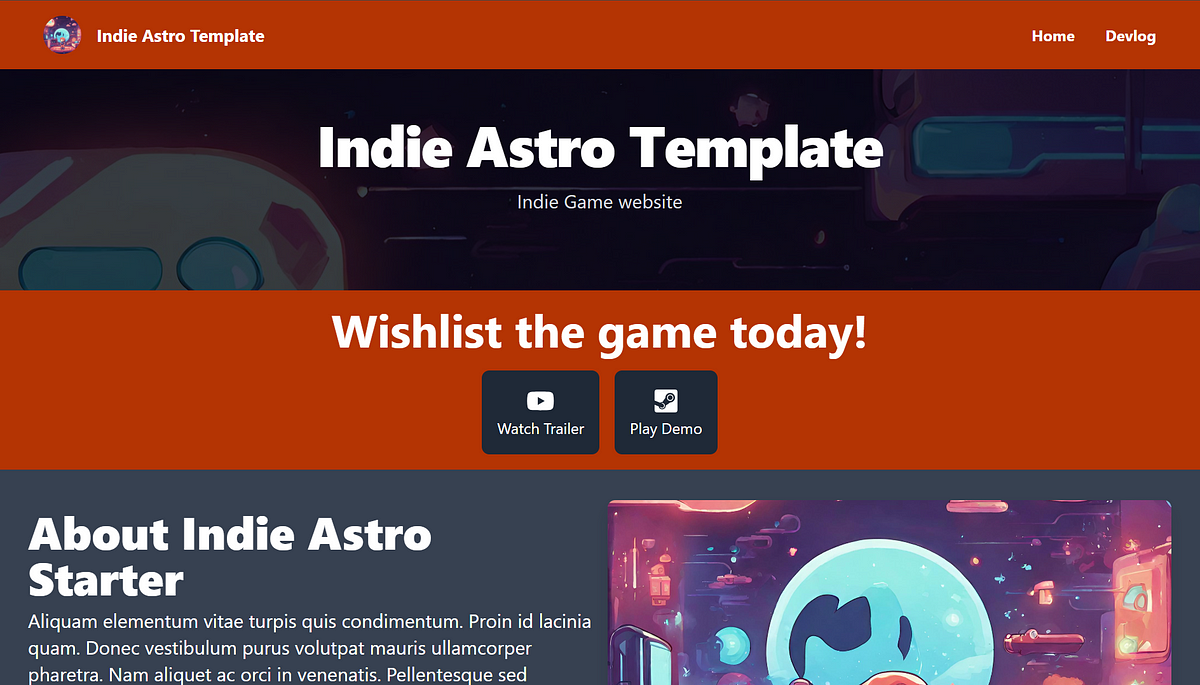
Live Template — https://indieastrotemplate.netlify.app/
The template includes all the source files, and you can edit the folders to include your own images and markdown files accordingly.
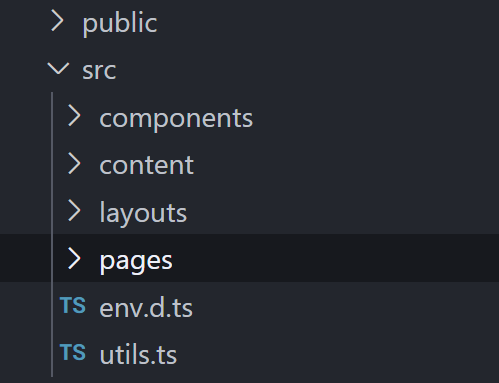
Template Deep Dive
After you download the zip file, Unzip it then open it in Visual Studio Code and examine the src folder.
Layouts
MainLayout.astro is the only layout file in this template, it contains Astro View Transitions which adds a seamless animation between pages. This file also includes the Header and Footer components that we will deep dive into later.
---

import { ViewTransitions } from "astro:transitions";
import Header from "../components/Header.astro";

import Footer from "../components/Footer.astro";
interface Props {
  title: string;
  description?: string;
  image?: string;
}

const {
  title,
  description = "Game Website Template",
  image = "/images/gaming.jpg",
} = Astro.props;
---

<!doctype html>
<html lang="en">
  <head>
    <meta charset="UTF-8" />
    <meta name="description" content={description} />
    <meta name="viewport" content="width=device-width" />
    <link rel="icon" type="image/svg+xml" href="/favicon.svg" />
    <meta name="generator" content={Astro.generator} />
    <meta property="og:image" content={image} />
    <title>{title}</title>
    <ViewTransitions/>
  </head>
  <body class="min-h-screen bg-gray-700">
 <!-- component -->
  <Header gameTitle= "At Your Service Website" gameLogo="/images/vgbanner.jpg"/>
  <!-- Add Heading Title and image -->
 <main>
  <slot />
 </main>

  <Footer />
  </body>
</html>
You can change the gameTitle, put your images in the public/images folder and you can reference the image under the gameLogo. You can update the description in the head too.
Components
Header.astro
---
type Props = {
  links?: Array<string>;
  gameTitle: string;
  gameLogo: string;
};
const {
  gameTitle,
  gameLogo,
  links = [
    {
      name: "Home",
      link: "/",
    },
    {
      name: "Devlog",
      link: "/devlog",
    },
  ],
} = Astro.props;
---

<header
  class="flex justify-between items-center px-12 py-4 max-sm:px-5 max-sm:py-10 max-w-7xl w-full mx-auto bg-orange-700"
>
  <a href="/" class="flex items-center gap-x-4 font-bold text-lg text-white">
    <img src={gameLogo} alt="Game Logo" class="rounded-full h-10 object-cover hover:opacity-75 transition duration-300 eaae-in-out"/>
    {gameTitle}
  </a>
  <ul class="flex gap-x-8 font-bold">
    {
      links.map((item) => (
        <li class="text-white">
          <a href={item.link}>{item.name}</a>
        </li>
      ))
    }
  </ul>
</header>
Footer.astro
This is where you can edit the company details such as company name, company email, and social links.
---
type Props = {
  currentYear?: Date;
  companyDetails?: {
    companyname:string;
    email:string;
    youtube:string;
    twitter:string;
  };
};
const {
  companyDetails = {
    companyname: "Indie Astro Template",
    email: "email@email.com",
    youtube: "youtubehandle",
    twitter: "@twitterhandle",
  },
  currentYear = new Date().getFullYear(),
} = Astro.props;

---
Pages
You can customize when the user goes to a page that doesn’t exist. This usually results in a 404 error.
You can create your own 404 page which is included in the template under the pages folder. You can change the image and text in this file to your liking.
404.astro
---
import MainLayout from "../layouts/MainLayout.astro";
---

<MainLayout title="404 - Indie Astro Template Page Not Found">
  ...
    <img
      src="/images/vgbanner.jpg"
      class="w-full h-64 rounded-md object-cover"
    />
....
</MainLayout>
Next, let’s explore the index.astro file. This is the website landing page. This includes elements from the layouts and components folders respectively.
---
import MainLayout from "../layouts/MainLayout.astro";
import Jumbotron from "../components/Jumbotron.astro";
---
<MainLayout title="Change the Title">
  <Jumbotron heading="At Your Service" , subtitle="2D Pixel Simulation website" />

</MainLayout>
Remember you can change the title and the image of the MainLayout component.
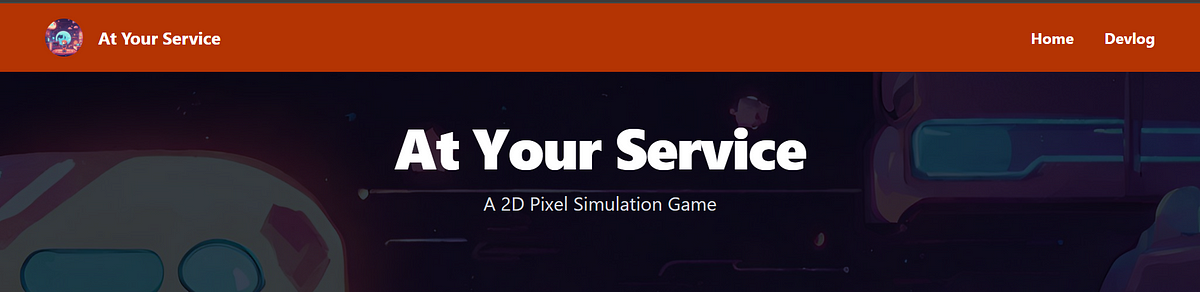
screenshot of the Jumbotron
As you can see many components are being pulled into this one. Let’s examine each of these in detail.
More Components
Jumbotron.astro
These are the elements you can edit as well as change the URL for the image to customize the section background.
---

const {
  heading="At Your Service",
  subtitle = "A 2D Pixel Simulation game",
} = Astro.props;
---
<section
  class="bg-cover bg-no-repeat bg-[url('/images/vgbanner.jpg')] bg-gray-700 bg-blend-multiply"
>
About.astro
In this file, you can edit the paragraph and featured image to show in the About section of the index page.
These are the elements you can edit in the template. The Game Title, Description, and the Game Logo as well as an area to add more details about the website or game.
gameTitle?: string;
  gameDescription?: string;
  gameLogo?: string;

<p class="text-xl mt-2">
      Aliquam elementum vitae turpis quis condimentum. Proin id lacinia quam.
      Donec vestibulum purus volutpat mauris ullamcorper pharetra. Nam aliquet
      ac orci in venenatis. Pellentesque sed sollicitudin mauris, id
      sollicitudin felis. Fusce scelerisque nisl mauris, ut egestas odio posuere
      in. Duis id finibus orci, sed faucibus erat.
    </p>
Team.astro
This is the section where you can change the names, roles, and images for your team as well as their GitHub and X/Twitter links respectively.
---
import Icon from "astro-icon";
type Props = {
  sectionTitle?: string;
  sectionContent?: string;
  gameTitle?:string;
  members?: Array<Object>;
};
const {
  sectionTitle = "Our Team",
  gameTitle="Indie Astro Starter",
  sectionContent = ` Meet the team that is working on ${gameTitle}`,
   members = [
    {
      name: "Lana Koft",
      role: "Art Director",
      twitter: "@lanakoft",
      github: "lanakoft",
      image:
        "https://images.unsplash.com/photo-1531590878845-12627191e687?ixlib=rb-1.2.1&ixid=MnwxMjA3fDB8MHxwaG90by1wYWdlfHx8fGVufDB8fHx8&auto=format&fit=crop&w=764&q=80",
    },
    {
      name: "Mario B",
      role: "Level Designer",
      twitter: "@mariome",
      github: "mariome",
      image:
        "https://images.unsplash.com/photo-1570295999919-56ceb5ecca61?ixlib=rb-1.2.1&ixid=MnwxMjA3fDB8MHxwaG90by1wYWdlfHx8fGVufDB8fHx8&auto=format&fit=crop&w=880&q=80",
    },
    {
      name: "Mark T",
      role: "Lead Programmer",
      twitter: "@yoshime",
      github: "yoshime",
      image:
        "https://images.unsplash.com/photo-1535713875002-d1d0cf377fde?ixlib=rb-1.2.1&ixid=MnwxMjA3fDB8MHxwaG90by1wYWdlfHx8fGVufDB8fHx8&auto=format&fit=crop&w=880&q=80",
    },
  ],
} = Astro.props;
---
CTA.astro
This is the Call-to-Action component — this contains a message for the user as well as a link to the Steam page or YouTube trailer of the game.
You can edit these in the file or change them into other links completely, just be sure to update the Icon to your needs.
---
import Icon from "astro-icon";
const { text, subtitle = "", steamlink = "/", youtubelink = "/" } = Astro.props;
---
...
Extra Components
Search.astro
This is the search component that is used when you search by tags and when you search for a specific devlog.
DevlogCard.astro
Similar to a Card component this takes the title, tags, author and publish date from the .md file.
DevlogCardRecent.astro
This is similar to the DevlogCard.astro, but it is styled differently for the featured devlog on the Devlog page.
Tags
This is the component that displays all the tags in the .md file.
With any of these components, you can style them to your liking as Tailwind CSS is being used.
Markdown files
The devlog section of the website draws its content from the content folder.
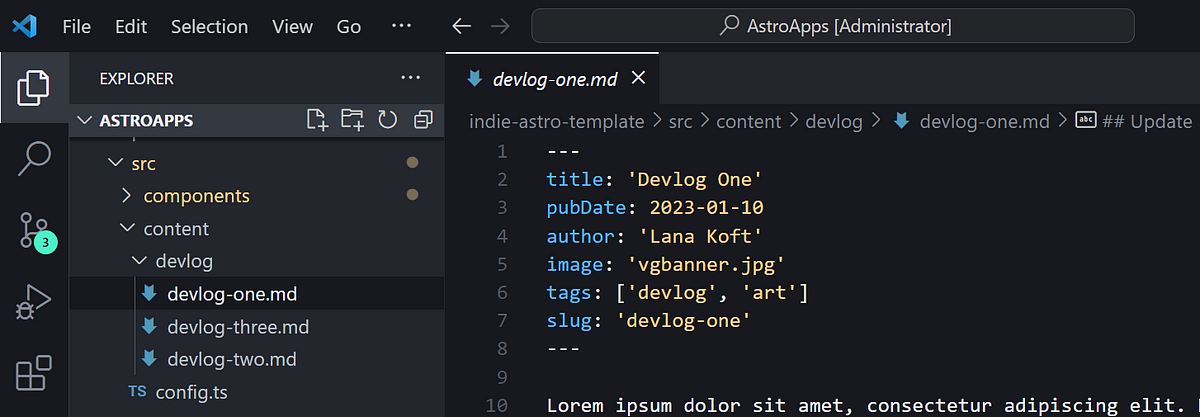
This area of the website is for the development log content, such as updates to the game’s coding, assets, and any other interesting information for players to follow the game’s progress.
Any .md files in this folder will be called in the devlog/index.astro page
Conclusion
Thank you for taking the time to read the guidelines for using this template created using Astro. If you would like to watch a video instead, the link is below.
Download Template — https://bit.ly/indie-astro-template
Template with Discount — https://bit.ly/indie-astro-template


